Creating Attributes and Attributes Values
Picking up from the previous lesson, when the modal window opens, in the top navigation, click on Attributes. You should see a message that no attributes found...No suprises there; you have just set up the field.

Let us create a couple of attributes. On the top right of the window, click on the link Create an Attribute.

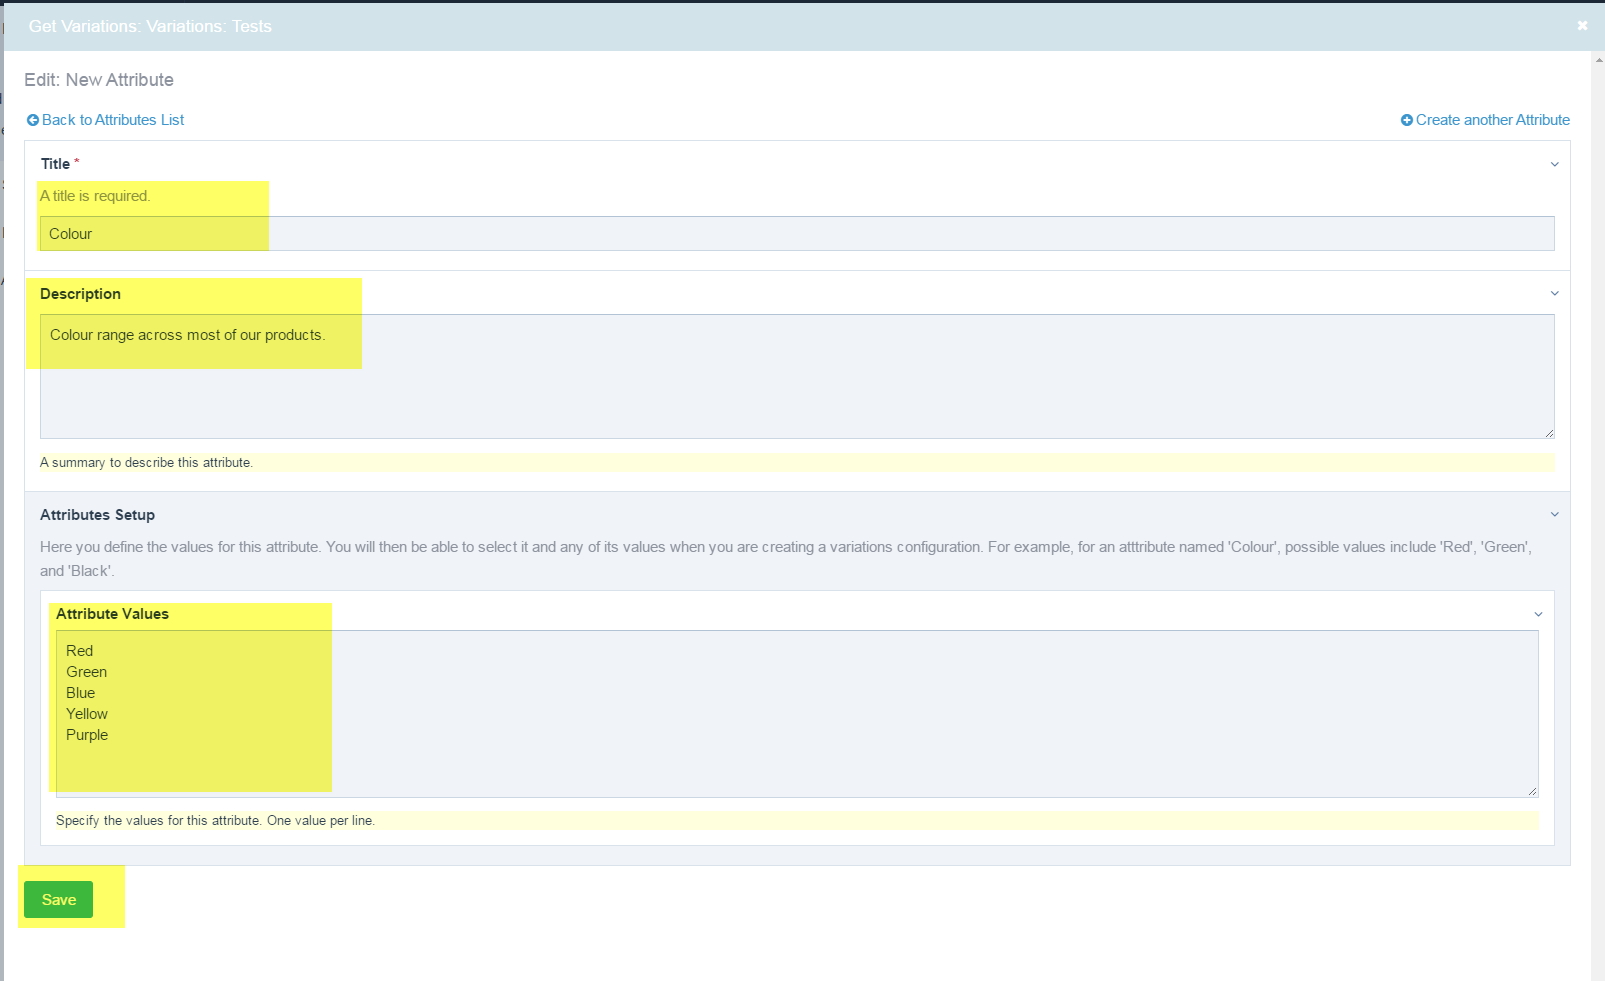
You should now see a form to create a single attribute and its values. A title and attribute values are required. If you try to save the form without these values you will get an error. If you try to create an attribute with the title of an attribute that already exists, you will also get an error.
There is an input for entering a description. This is useful in several situations, for instance, if there are multiple editors that will be using the Variations field. It can also be used to differentiate between two similar attributes (e.g. Colour 1, Colour 2, etc).
Enter a title for the new attribute. In this lesson, we will create two attributes. Let us call the first one Colour. In the description input, enter whatever you wish.
There is no limit to the number of attribute values that an attribute can have. To keep things simple though, we will go with 5 colours - Red, Green, Blue, Yellow and Purple. These values have to be entered each in its own line. Please note that duplicate values will be removed.
Your form should now be similar to the below.
It is important to note that attributes can be shared across different variations configurations. This means that you do not need to create similar attributes for different pages or products. For instance, from the module's point of view (i.e., technically), a Red phone and a Red Bag both share the same colour attribute; they are Red, period.
Click on the button Save to save the attribute.
Next, we create the second attribute. In this lesson, we go with Size. On the top right corner of the modal window click on the link Create another Attribute. That should open a new form to create an attribute.

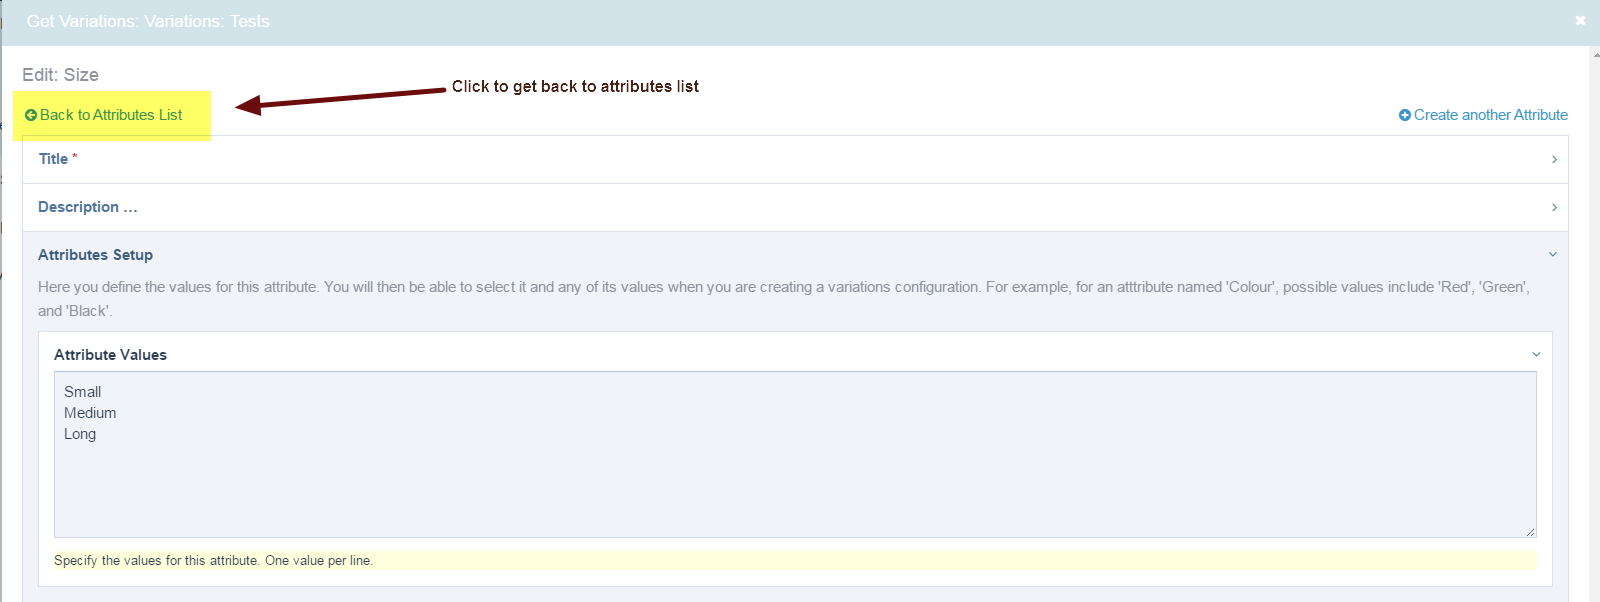
Since we are going to create the attribute Size, enter that for the title, give it a description and the attribute values Small, Medium, and Long. Save the attribute.
For these lesson, these are enough. You can add as many attributes as you wish. To edit an attribute value, just overwrite it. To add a value, just add it wherever you want within the attribute values' list.
Next, we will create a variations configuration to link to our page. To exit the create/edit attribute page, click on the link Back to Attributes List.
You will see a list of attributes consisting of the two attributes we just created; Colour and Size. If you gave your attribute a description, you will see it below the attribute name. Otherwise you will see a message that no attribute description was found. Below the description you see a comma-separated list of the attribute values for each attribute. This is a useful overview if you just want to quickly see what values have been defined for a given attribute. Below this, you will see a padlock icon, denoting whether the attribute is locked for edits or not. We will look at this aspect later.
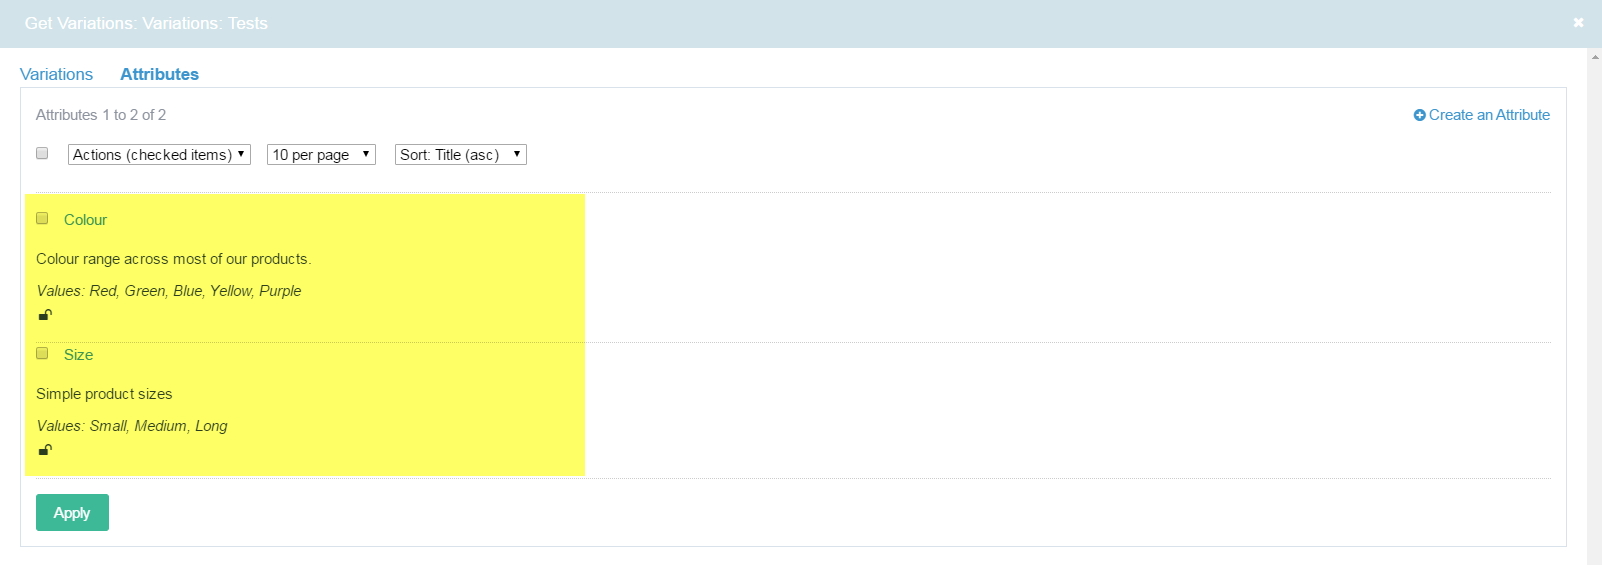
Clicking on the title of an attribute will take you back to its edit screen.
In the lesson about Bulk Editing Attributes, we will look at the actions that can be applied to multiple attributes. For now though, we want to create a variations configuration. We do this next.